A full day’s hike is hugely improved with a decent picnic, and you need food that both fuels you and delivers on the flavour front.
The key to a good walking picnic is to take some food that tastes as good, if not better, eaten at room temperature rather than hot or chilled. It also needs to travel well, rather than get squished or become soggy. I like to take a lunchbox with compartments for separating savoury from sweet, and also a couple of nutritious snacks that I can keep in bags in my coat pocket to combat hunger pangs.
Hiking food
As a general rule, the longer your walk the more thought you should put into your walking fuel. After all, the energy to power us forwards (and upwards) derives only from the food we put into our mouths. With that in mind, here are a few tips when thinking about what to put in your lunchbox.
You are after food that fuels, so high-energy carbohydrate foods are best for long hikes. Try to ensure you consume plenty of slow-release carbohydrates in the form of whole grains, pulses or natural sugars.
Combining a lean protein, such as chicken, with a slow-release carbohydrate such as wholegrain pasta means the energy is released even more steadily, so you don’t get highs and lows in your energy levels.
Don’t binge eat. Snacking as you go helps keep energy levels on an even keel, so it’s great to have one or two healthy high-energy treats tucked into your pockets for easy access.
Hydration is vital, so take plenty of fluids. Plain and simple water quenches thirst much more effectively than fizzy drinks that are loaded with sugar.
Finally, make sure your food is genuinely tasty. Season it properly, just as you would if you were at home. That way you are much more likely to actually finish it.
5 recipes to keep you fuelled for the trail
Menu
- Pasta salad with chicken
- Smokey salted nuts
- Hard-boiled eggs with sesame dukka
- Granola and oat clusters
- Chocolate and hazelnut brownies
Lunch: Pasta salad with chicken pesto and mozzarella
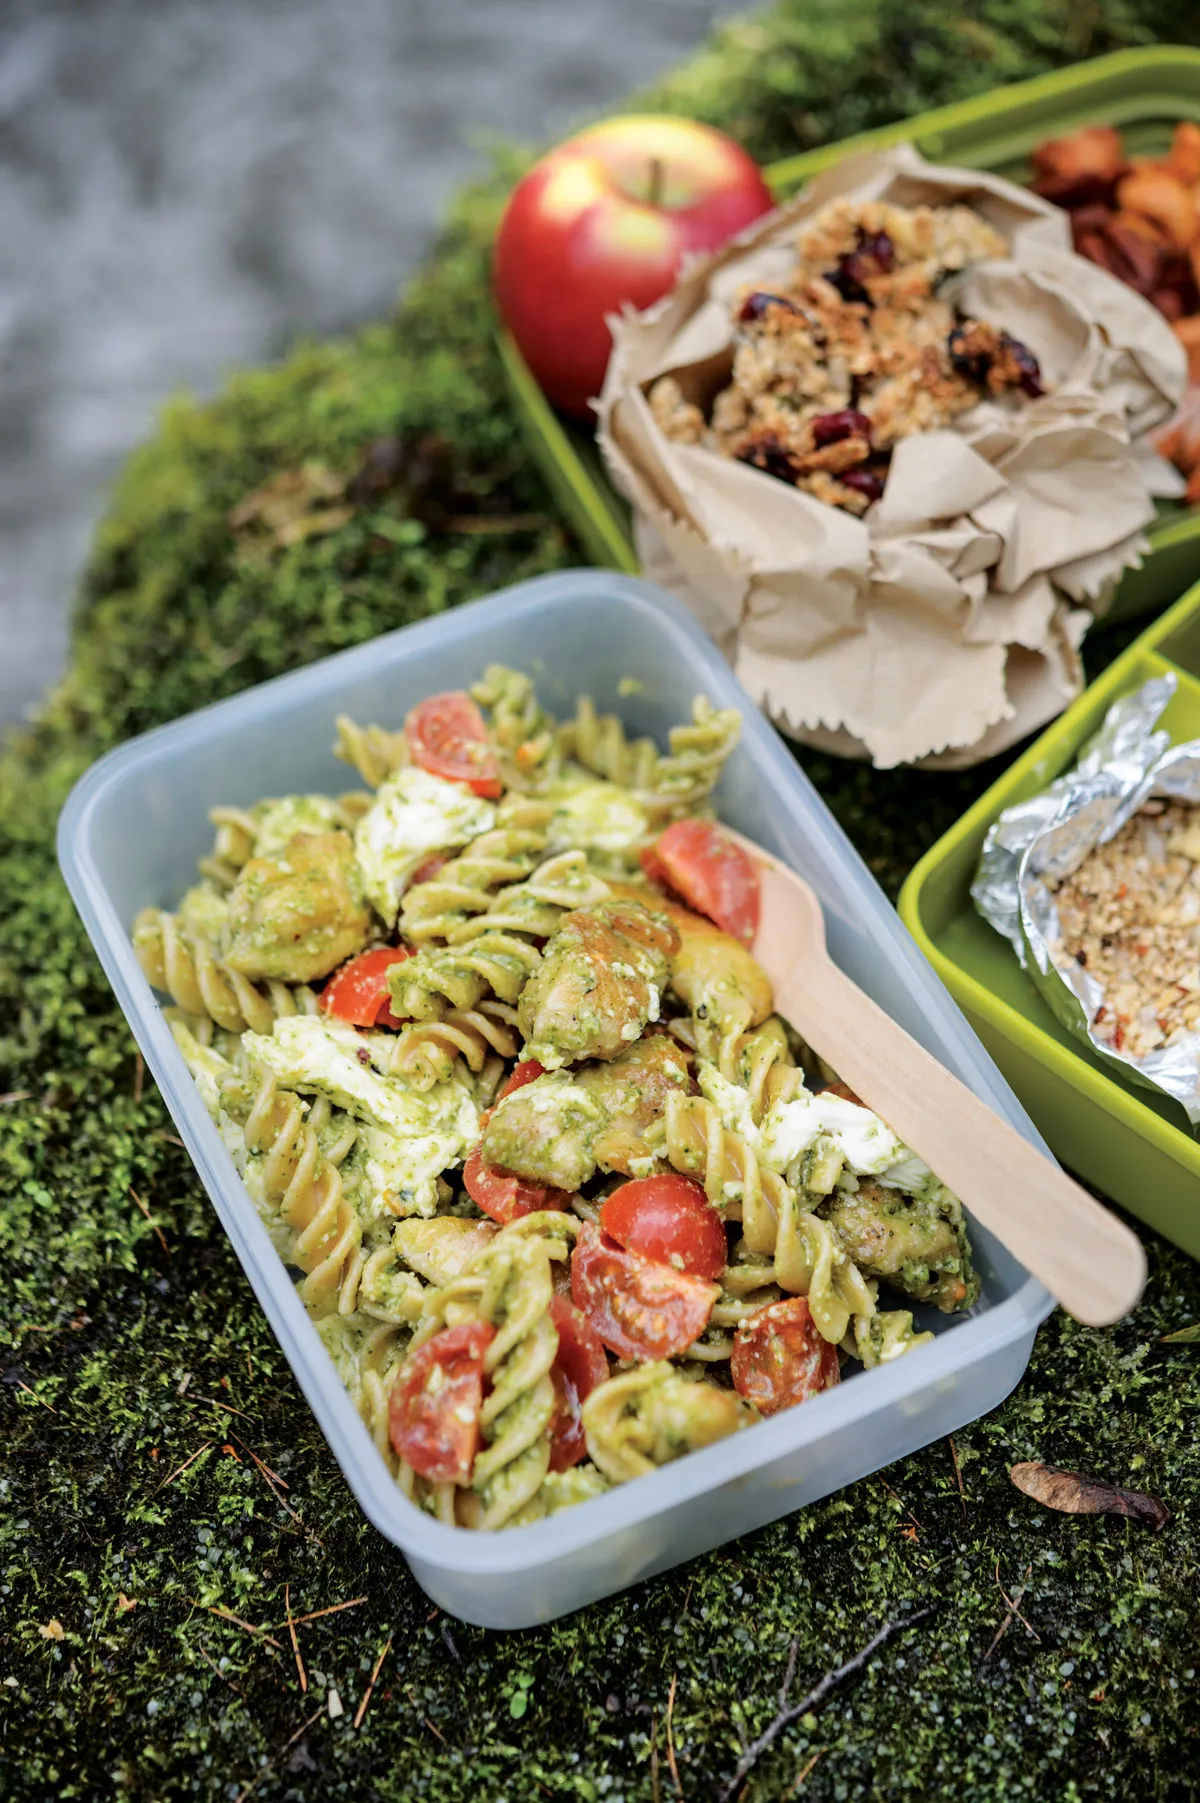
Wholegrain pasta is a great slow-release fuel to keep you going all afternoon. You could, of course, use ready-made pesto in this tasty salad, but if you’ve never made your own pesto, I urge you to give it a go. It only takes a quick whizz in the food processor, and the flavour is so vibrant.
Ingredients Serves 2
For the pesto:
50g pine nuts
50g bunch basil, leaves and stalks
25g parmesan, freshly grated
1 clove garlic
2 tbsp extra virgin olive oil
a squeeze of lemon juice, to taste
salt and freshly ground pepper
For the salad:
1 heaped tsp plain flour
300g boneless, skinless chicken thighs, cut into 3cm cubes
1 tbsp olive oil
150g wholegrain pasta
250g cherry tomatoes, quartered
1 ball mozzarella, torn into bite sized pieces
salt and freshly ground pepper
Method
1. To make the pesto, set a small frying pan over a medium-high heat and add the pine nuts. Toast for a few minutes until golden brown and smelling nutty, then tip into a food processor and whizz until ground. Roughly tear the basil stems and leaves, trimming the stalks only at the very ends if they are really thick, and add to the food processor, whizzing until finely chopped. Add the parmesan, garlic, olive oil and lemon juice, and season with salt and pepper. Scrape into a mixing bowl (large enough to toss the salad in) and set aside.
2. For the salad, sprinkle the flour on to a plate, season well with salt and pepper, then toss the chicken in the flour to lightly coat.
3. Set a frying pan over a medium-high heat and add the oil. When it’s hot, tip in the chicken. Spread it out in a single layer, and fry until crisp and golden, turning a couple of times until it’s cooked all the way through – about 15-18 mins. Remove the chicken and put on a plate lined with a couple of sheets of kitchen paper to drain any excess oil.
4. While the chicken is frying, cook the pasta according to the packet instructions – about 12 mins at a hearty boil. Drain the pasta into a colander, then run briefly under cold water to cool before draining really well. Tip into the mixing bowl, and toss through the pesto until it’s evenly coated.
5. Add the cooked chicken, tomatoes and mozzarella and toss together. Pack into your lunchboxes, and chill until you are ready to hike. And don’t forget to pack a fork! This salad will happily keep in the fridge overnight if you want make it ahead.
Snack idea: salted smoky nuts
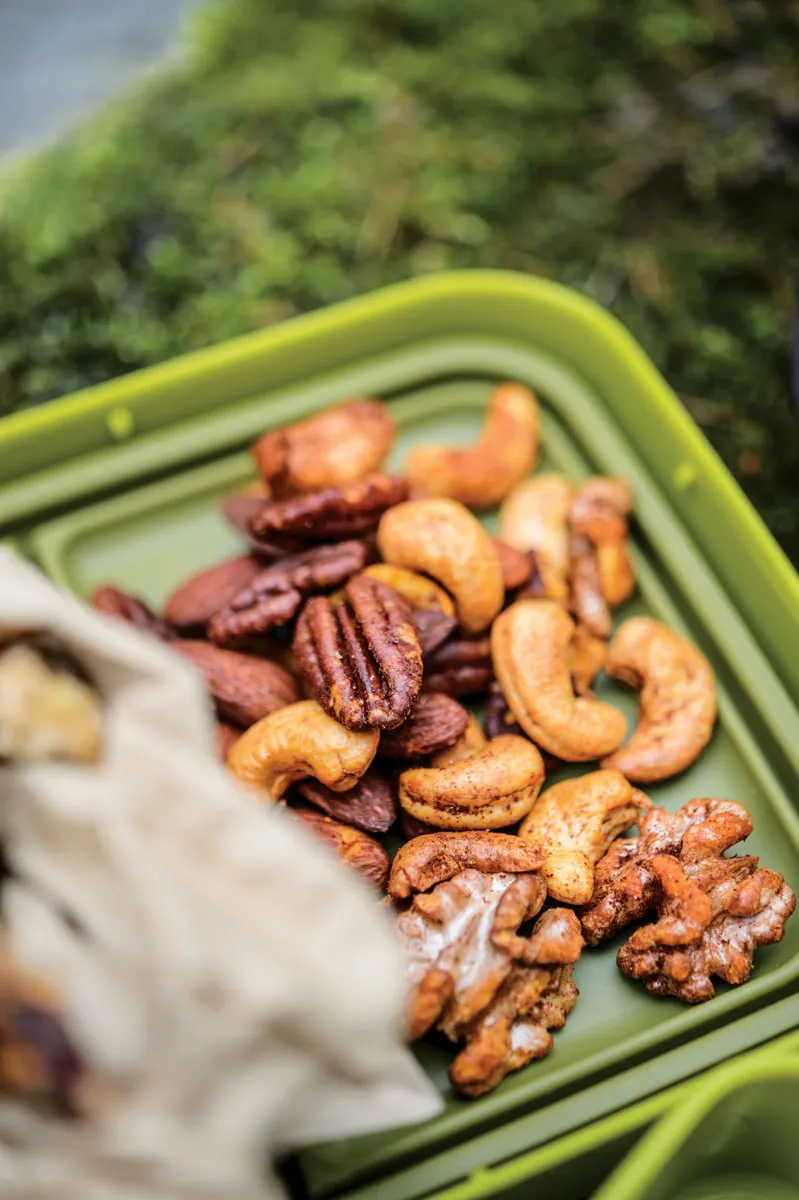
These nuts are so easy and incredibly moreish and just the thing to have in a little bag in your pocket for on-the-go nibbling. I’ve used a mix of nuts for variety, but feel free to use your favourites. This is a very easy recipe to double up if you want to make more. They will keep well in an airtight tin for a good week or so. They also make a rather fabulous bar snack.
Ingredients serves about 4-6
Method
1. Preheat oven to 180°C (fan temp)/ Gas 4.
2. Spread the nuts out over a large roasting tin. Bake in the oven for 10 mins.
3. Remove from the oven and stir through olive oil, paprika and salt, then return to the oven for another two mins. Remove from the oven and allow to cool on the tray before packing into an airtight container, which should keep them fresh for at least a week.
Hard-boiled eggs with sesame dukkah
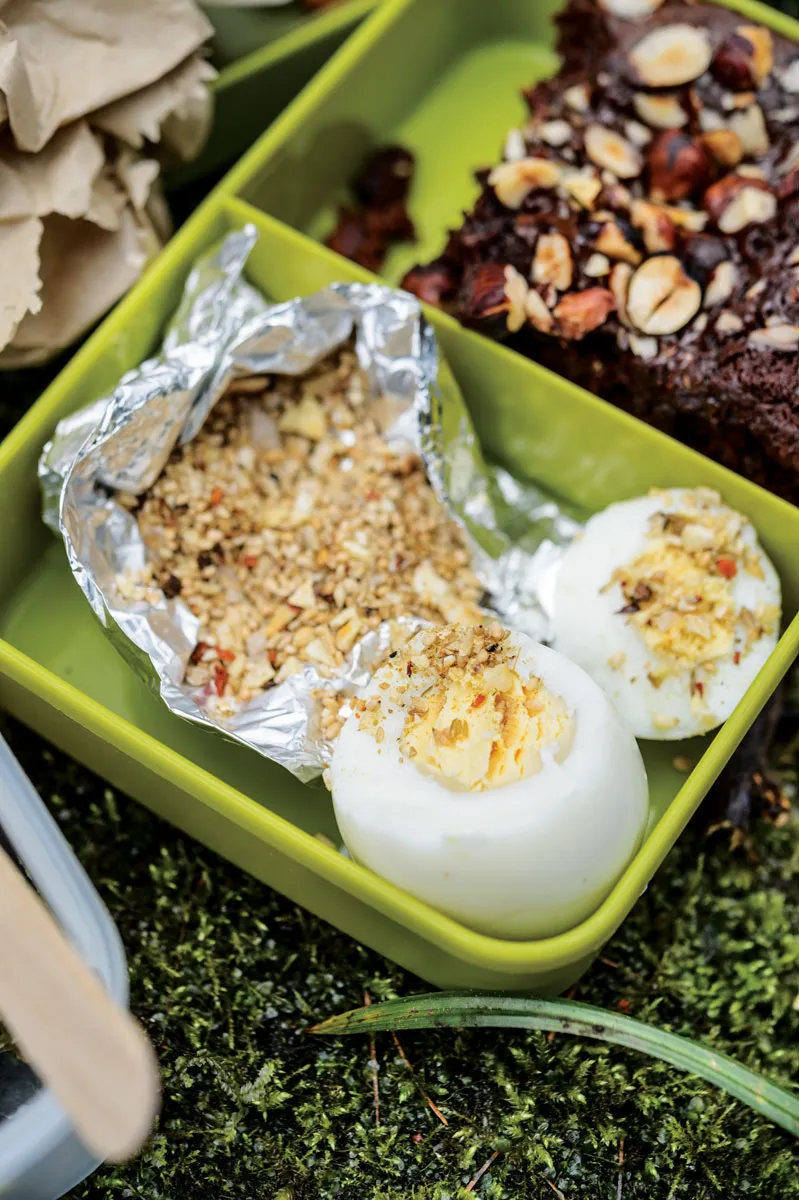
I think hard-boiled eggs make the perfect picnic food – nutritious, easy to carry and conveniently packaged in their own wrapper. They do benefit, however, from something to gee them up in the taste department. A little salt and pepper is good, but this little Egyptian nutty spice mix, called dukkah, will lift your egg to the next level. You can make it in moments, much less time than it takes to boil the eggs, and it will keep in a sealed tub for a good few weeks.
Makes enough for 4 eggs
Ingredients
1 heaped tsp cumin seeds
1 heaped tsp coriander seeds
1/2 tsp chilli flakes (optional)
2 tbsp flaked almonds
1 tbsp sesame seeds
Pinch of sea salt flakes and freshly-ground black pepper
1. Add the cumin, coriander and chilli (if using) to a small, dry frying pan and set over a medium heat. Toast for a minute or so until they smell fragrant then tip into a spice mill or pestle and mortar and grind. Tip into a small bowl.
2. Add the almonds and sesame seeds
to the pan and toast them for a minute or so. Tip on to a board and chop finely before adding to the spices along with a pinch of sea salt flakes and a good grind of black pepper. Stir well to mix, then add heaped teaspoons of your mixture to squares of foil and wrap them tightly, allowing one teaspoon of dukkah per egg. Pack into you lunchbox alongside your ready-cooked egg.
Early morning snack: Homemade maple and oat granola clusters

Homemade granola is a fantastic thing to make for breakfast but it also travels really well. Packed with high-fibre oats, coconut flour and full of natural sweetness from maple syrup and cranberries, it also makes a great snack to have in your pocket to munch as you walk. This recipe makes a good-size boxful that would serve 4-5 for breakfast, or more as a snack. Provided you keep it in an airtight box, it will last for several weeks at room temperature.
Ingredients
250g oats
150g mixed seeds (pumpkin, sesame, sunflower seeds)
100g dried cranberries (or raisins)
150ml maple syrup
1 egg white
3 tbsp coconut flour
3 tbsp brown sugar
3 tbsp vegetable oil
1 tsp vanilla extract
Finely grated zest of 1 orange
1. Preheat the oven to 180°C (fan temp)/ Gas 4. Line a large roasting tray (approx 40cm x 25cm) with baking paper.
2. Stir all the ingredients together in a mixing bowl, tip onto the baking tray and spread out in a shallow layer without pressing down too firmly.
3. Bake in the oven for about 25 mins, until the granola is golden brown. Turn the tray around halfway through cooking if your oven cooks unevenly. Allow to cool completely on the tray, then break up into clusters. What you don’t take with you can be stored in airtight containers.
High-protein chocolate and hazelnut brownies
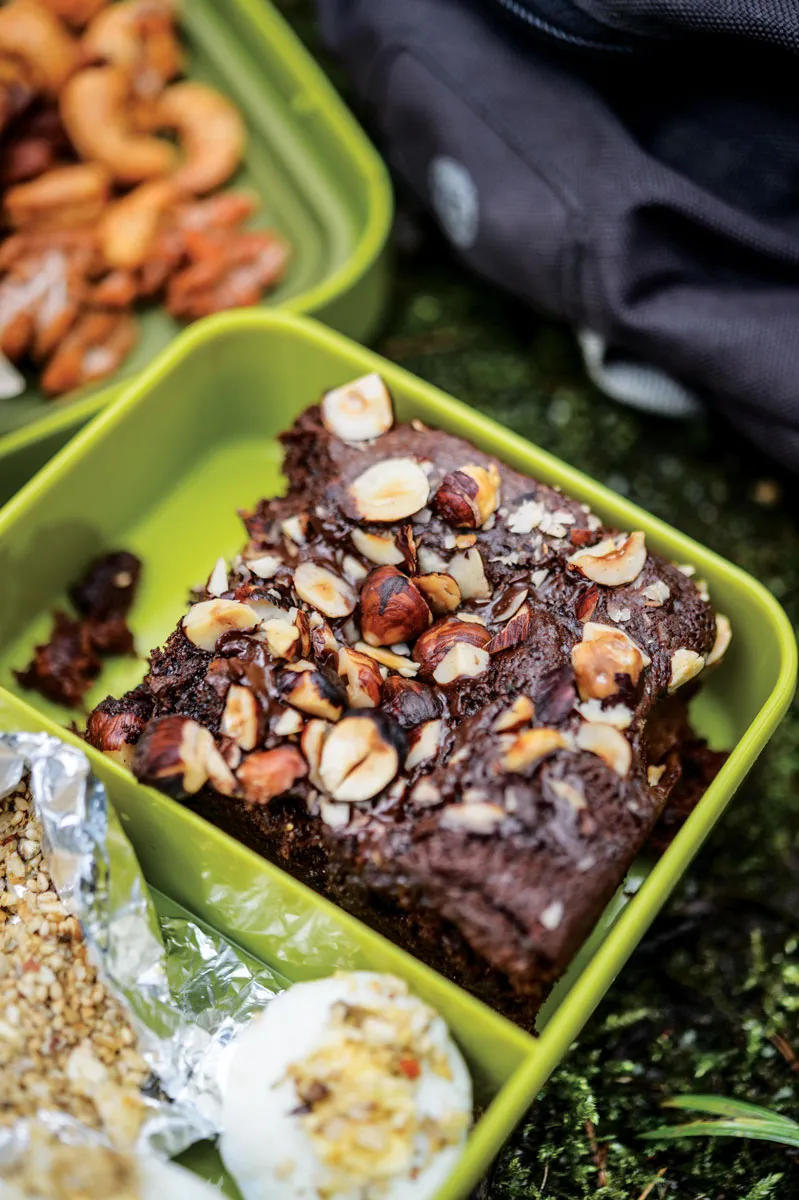
Chocolate brownies are generally a big hit but these have the added bonus of being just a little bit more nutritious than a regular version, thanks to a secret ingredient. It’s actually a tin of cannellini beans, but sshhhh, nobody will notice.
Ingredients Makes 12 generous brownies (cut into 16 if you prefer)
400g tin cannellini beans, drained and rinsed
300g dark chocolate, roughly chopped
75g butter, cut into cubes
3 large eggs
150g soft brown sugar
75g plain flour
2 tsp baking powder
Half tsp bicarbonate of soda
2 tbsp vanilla extract
100g hazelnuts, roughly chopped
1. Preheat the oven to 180°C (fan temperature)/ Gas 4. Grease and line a 25cm square baking tin with baking paper.
2. Add the drained beans to the bowl of a food processor and whizz until they are ground to a fine crumbly paste.
3. Add two-thirds of the chocolate to a heat-proof bowl, along with the butter and set over a pan of barely simmering water, making sure the base of the bowl is not in contact with the water. Allow to melt, stirring together until combined.
4. Once the chocolate and butter have melted, pour into the food processor and crack in the eggs. Whizz together to a really smooth puree. Then add the sugar, flour, baking powder, bicarbonate of soda and vanilla and process together until smooth.
5. Pour the brownie mixture into the prepared tin, levelling with a table knife. Finally scatter over the hazelnuts and the rest of the chocolate.
6. Bake in the oven for about 25 minutes until the top is set and the brownie is just starting to come away from the edge of the tin. Allow to cool in the tin, before removing and cutting into squares.
All images by Jason Ingram

