The golden hour in photography is well-known by landscape and portrait photographers alike for giving shots a warm, reddish tint. If you've never tried shooting during the golden hour, give it a go because it can imbue your pictures with a glow that's far superior and more natural than any filters or after-effects you can add.
Looking for more photography inspiration? See our top ten tips for photographing castles, discover the best wildlife photography courses in the UK and see our feature on the Countryfile Calendar 2023: this year's theme and how to enter.
What is the golden hour in photography?
The golden hour refers to two hours: the one just before sunset and the one just after sunrise. At this time of the day, the sun's rays have farther to travel and more atmosphere to get through, which creates a redder 'colour temperature'.
On a sunny day, the warm, diffused light at these times can transform your photos, and the good news is that you can try them in winter, too, when there's no need to get up at 3am to catch the dawn!
When is the golden hour and how long does it last?
The timing of this magic window changes every day in line with the movements of the sun. The quality of the light also depends on where you are in the world, but for photographers in the UK, it lasts about an hour. Winter sunsets are shorter, although the light is more golden because the sun is as far away as it gets throughout the year.
How to make the most of the golden hour in photography
Here are some tips and tricks for taking advantage of this magical light.

1. Plan ahead
Pick a location to shoot at beforehand, and then calculate precisely when the golden hour occurs by checking when the sun will rise and set using an online calendar. Plan to get into position 15 to 20 minutes before the hour begins. It can mean an early start in the morning, but it'll all be worth it for the magical dawn landscapes you can capture.
2. Shoot fast
You've got a small window to shoot in, and the weather can change quickly, so get snapping as soon as the conditions are right. Keep taking shots throughout the hour – the light will change dramatically as the sun moves.

3. Switch to a wide aperture for portraits
Increase the dreamy golden feeling of portrait and macro shots at first and last light by switching down to a wide aperture of f/5.6. This will keep the focus firmly on your subject and help you create a bokeh effect in the background with any pinpoints of light.
4. Take a tripod for landscapes
The above doesn't apply for landscape shots, when you'll need an aperture of something like f/22 to get everything in focus. The light won't be as strong as in the middle of the day, though, so you'll need a tripod to ensure everything stays sharp.
More related content:
- Britain’s best locations for landscape photography
- Podcast: How to take great outdoors photography
- Countryfile Calendar competition 2023: this year’s theme and how to enter
© Jarek Kurek, 'First Flight', BBC Countryfile Calendar 2018
5. Adjust White Balance
Your camera will try to compromise for the warm golden tones it is perceiving, so switch out of auto White Balance and pick 'cloudy' instead to keep the colours true.
6. Experiment with flare
'Flare' is what happens when sunlight hits the front of the lens and distorts the image, adding sun spots or rays to your shot. The good news is that you can use it deliberately to add drama to a photograph. If your subject is between you and the sun, reposition yourself so that the sun is particially masked and see if you can create a sun ray effect.
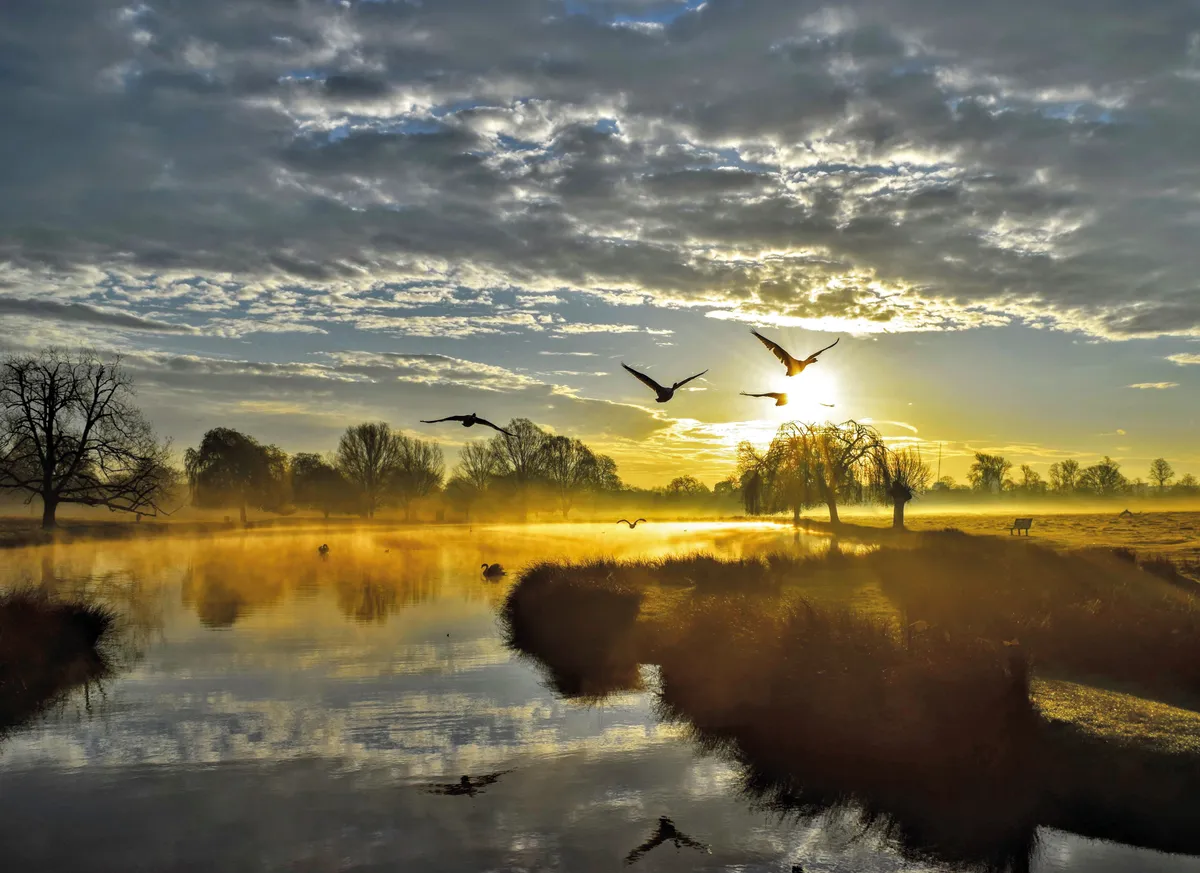
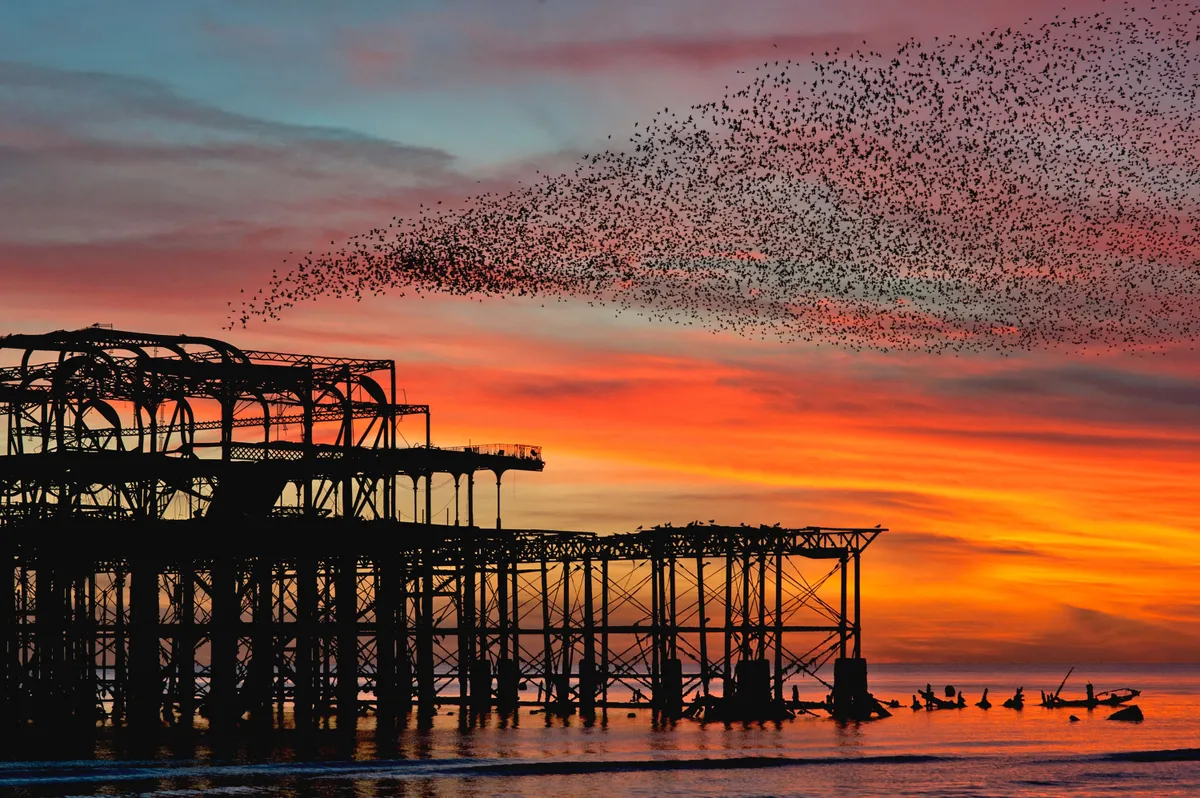
7. Play with silhouettes
If you're shooting portraits or objects, try placing them directly in front of the setting sun to create a strong, silhouetted look. You can also achieve this with far-off wildlife, such as birds flying in front of the sun.
8. Shoot into the sun
Alternatively, if you want to keep the detail in your subject but they're looking dark, compensate by upping your exposure by one or two stops to avoid losing their features.
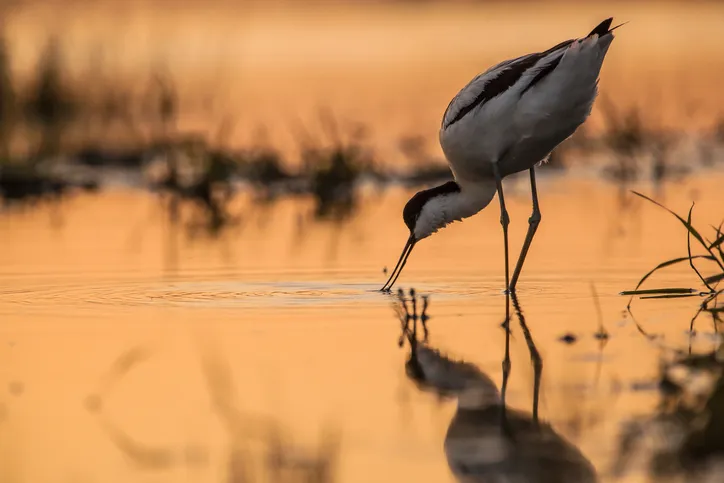
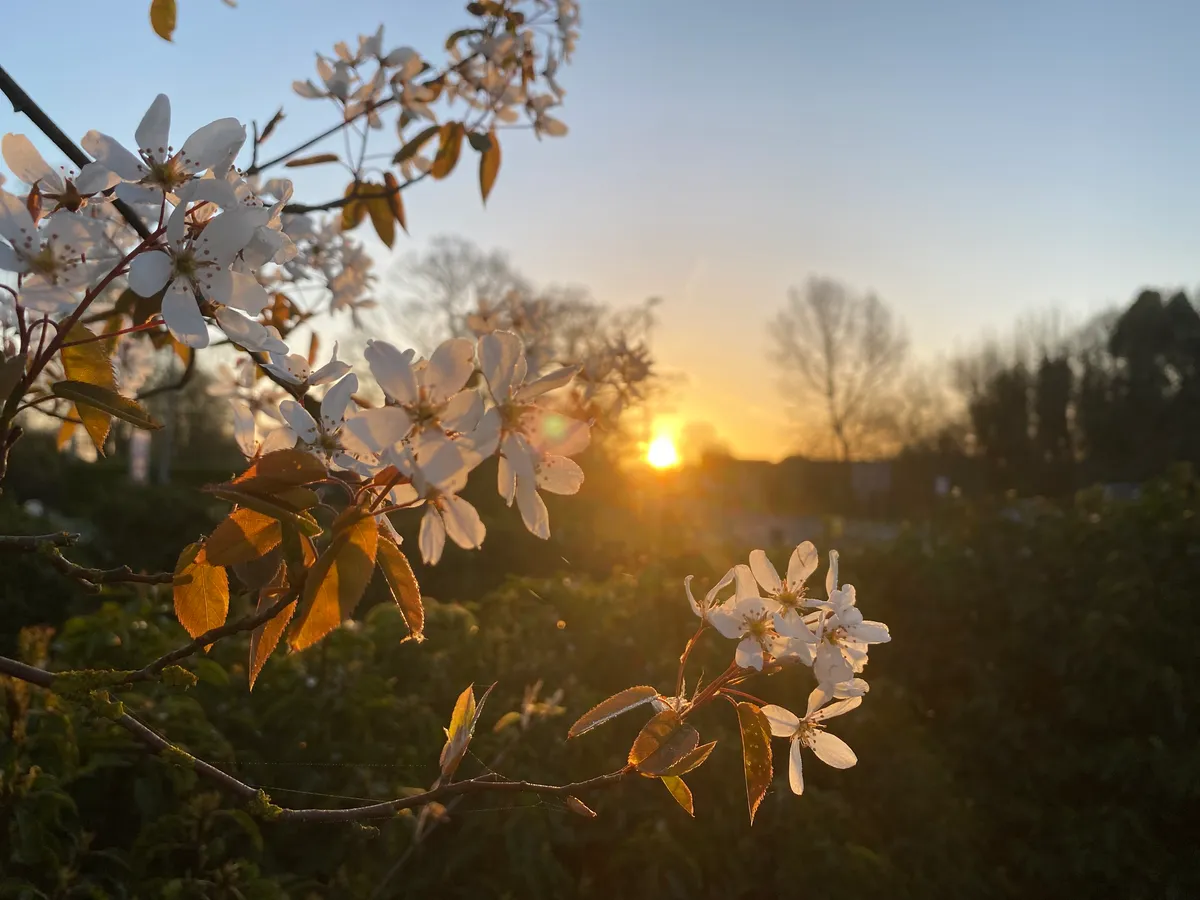
9. Pick out detail
Low light in the sky can create beautiful rim lighting around your subjects.

This works especially well for close-up shots of plants and flowers, highlighting their delicate shapes.
It's always fun to get down low, because shooting upwards can give some really nice effects. Mix it up by shooting through trees and flowers.
Tim Bates, art director of BBC Countryfile magazine and expert photographer
Main image credit: A swan in the morning mist./Credit: Getty


